Here we add monitoring on OMR database and after that add host on target database server and add monitoring on it using EM 13c Console .
OMR database and OEM 13c are in same server so agent already installed at the time of installation so we add monitoring on server.
- Add Discovery target on OMR database
- Add OEM agent on target host and add discovery target
OMR Database : OEMDB
Hostname : oem13c.example.com
New Target host name : srv3.example.com
Target Database : SMRCDB
Enterprise Manager Cloud Control URL: https://oem13c.example.com:7803/em also ( https://192.168.56.71:7803/em)
Admin Server URL: https://oem13c.example.com:7102/console
BI Publisher URL: https://oem13c.example.com:9803/xmlpserver/servlet/home
STEP 1 : Login OEM console and go to setting and add target manually
STEP 2 : choose 2nd option (Add Non-Host Targets Using Guided Process )
STEP 3 : As default oracle database and listener automatically set on discovery target types.
STEP 4: Target already installed so we select OMR database server oem13c.example.com
STEP 5: OEM will discover host at there end .
STEP 6 : Select on checkbox OEMDB database and add password of dbsnmp schema. By default it is locked.
SQL> alter user dbsnmp account unlock identified by dbsnmp;
User altered.
SQL> select USERNAME,DEFAULT_TABLESPACE,ACCOUNT_STATUS from dba_users where username='DBSNMP';
USERNAME DEFAULT_TABLESPACE ACCOUNT_STATUS
---------------------------------------- ------------------------------ --------------------------------
DBSNMP SYSAUX OPEN
STEP 7 : Discovery Target Review
STEP 8 : Target confirmation
STEP 9 : OEMDB database and listener Successfully on console.
Adding OEM Agent on target server and discover target for monitoring
OS NAME : srv3.example.com
STEP 1: Select add host targets
STEP 2 : Add host targets.
STEP 3 : Add named credential of oracle user and then root (optional) user .
STEP 4 : Add agent base directory /u01/app/oracle/agents . Instance directory will be automatically created.
Default port is 3872.
STEP 5 : Review Agent target hosts
STEP 6: Deploy agent Summary process
STEP 7: Agent successfully added on target server.
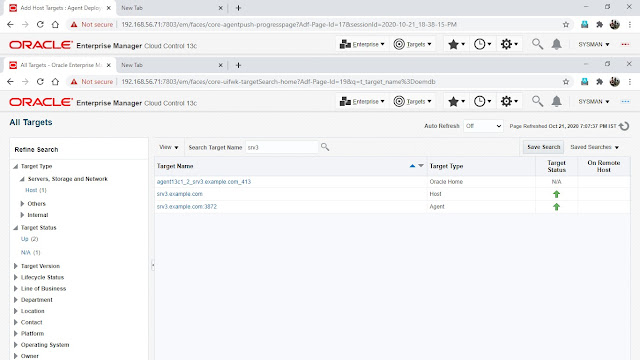 |
Add Discovery target on srv3.example.com agent |
STEP 1: Choose 2nd option ( Add using guided process and then further select default oracle database and listener option)
STEP 2 : Add host target details.
STEP 3: Add password dbsnmp user on database discovery results in this server we have CDB database so details will automatically fetch by discovery.
STEP 4: Database discovery review
STEP 5: Configuration of database and listener target saved successfully.
STEP 6 : Successfully done
STEP 7: OEM 13c Console Summary dashboard


