Step 1 :Select network interfaces from AWS console
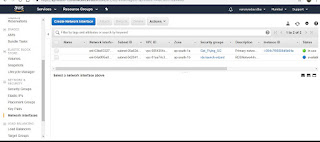
Step 2 : Create network interface ( select security group)
Step 3 : Select private IP subnet
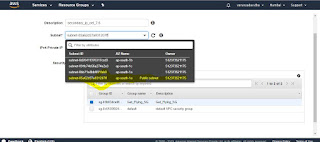
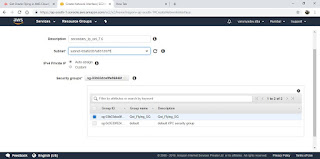
Step 4: Select private IP subnet with security group
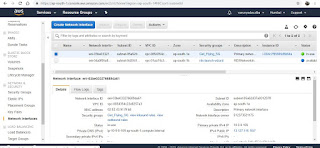
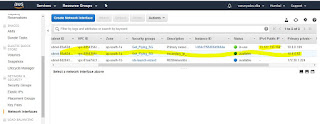
Step 5 : Private IP view
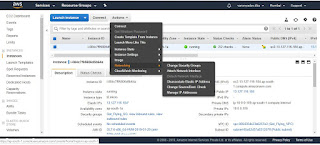
Step 6 : EC2 dashboard attach network associate
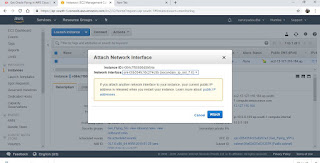
Step 7: Attach network interfaces
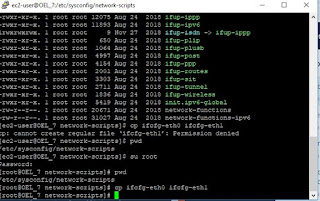
Step 8:
[ec2-user@OEL_7 network-scripts]$ cp ifcfg-eth0 ifcfg-eth1
cp: cannot create regular file ‘ifcfg-eth1’: Permission denied
[ec2-user@OEL_7 network-scripts]$ pwd
/etc/sysconfig/network-scripts
[ec2-user@OEL_7 network-scripts]$ su root
Password:
[root@OEL_7 network-scripts]# pwd
/etc/sysconfig/network-scripts
(take existing backup of ifcfg-eth0)
[root@OEL_7 network-scripts]# cp ifcfg-eth0 ifcfg-eth1
[root@OEL_7 network-scripts]#
[root@OEL_7 network-scripts]# vi ifcfg-eth1
# Created by cloud-init on instance boot automatically, do not edit.
#
BOOTPROTO=static
DEVICE=eth1
#HWADDR=02:02:43:91:f9:b8
HWADDR=02:64:3f:60:38:6e
ONBOOT=yes
TYPE=Ethernet
USERCTL=no
IPADDR=10.0.0.52
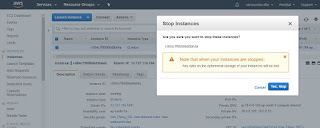
Step 9: Stop EC2 Instance
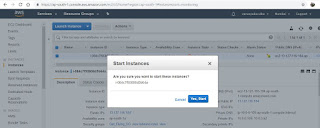
Step 10: Start EC2 instance
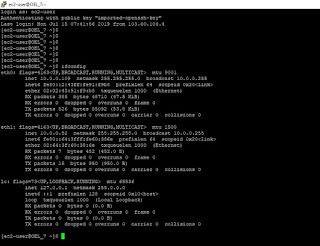
Step 11: Check IP using ifconfig

Step 2 : Create network interface ( select security group)

Step 3 : Select private IP subnet

Step 4: Select private IP subnet with security group

Step 5 : Private IP view

Step 6 : EC2 dashboard attach network associate

Step 7: Attach network interfaces

Step 8:
[ec2-user@OEL_7 network-scripts]$ cp ifcfg-eth0 ifcfg-eth1
cp: cannot create regular file ‘ifcfg-eth1’: Permission denied
[ec2-user@OEL_7 network-scripts]$ pwd
/etc/sysconfig/network-scripts
[ec2-user@OEL_7 network-scripts]$ su root
Password:
[root@OEL_7 network-scripts]# pwd
/etc/sysconfig/network-scripts
(take existing backup of ifcfg-eth0)
[root@OEL_7 network-scripts]# cp ifcfg-eth0 ifcfg-eth1
[root@OEL_7 network-scripts]#
[root@OEL_7 network-scripts]# vi ifcfg-eth1
# Created by cloud-init on instance boot automatically, do not edit.
#
BOOTPROTO=static
DEVICE=eth1
#HWADDR=02:02:43:91:f9:b8
HWADDR=02:64:3f:60:38:6e
ONBOOT=yes
TYPE=Ethernet
USERCTL=no
IPADDR=10.0.0.52

Step 9: Stop EC2 Instance

Step 10: Start EC2 instance

Step 11: Check IP using ifconfig
No comments:
Post a Comment